Aloitan uuden vuoden kunniaksi pigmentti-aiheisen postausten sarjan. Pigmenttejä on keskiverto ikonimaalarilla aika läjä, luonnollisia, synteettisiä, vaarattomia, myrkyllisiä, välttämättömiä ja tarpeettomia. Alussa on muutama purkki, ja perin vähällä sitä tuleekin toimeen. Plinius Vanhempi väitti, että antiikin Kreikassa palettiin kuului valkoinen, keltainen, punainen, vihreä ja musta. Väite tosin perustuu osittain väärinkäsitykseen värien nimistä, sillä Piniuksen aikaisessa latinassa ei ollut eri sanaa siniselle ja vihreälle. Yhtä kaikki, kuusi tai seitsemän oikein valittua pigmenttiä riittää hyvin tiukan paikan tullen.
Ikonimaalauskursseilla ruokahalu yleensä kasvaa syödessä, kun näkee toisilla malareilla mitä ihanampia värejä. Joskus tulee tehtyä heräteostoksia, tai vaihdettua kurssilaisten kesken pigmenttejä. Joitakin värejä tarvitaan joka työhön, tai suuria määriä, toista käyttää ehkä yhteen pieneen yksityiskohtaan.

Maalarin värilipas - Painter´s chest.
Kerran ostin erääseen työhön purkin Sennelierin Veronan vihreää - joka osoittautui ihan vääränlaiseksi, ärsyttävän räikeäksi, sen jälkeen en ole koskenutkaan koko väriin. Harmittaa aina kun näen purkin nököttävän itsetietoisen näköisenä kaapin perällä. Viime kesänä sain pienen määrän koboltin violettia, valeaa, mutta intensiivistä, ehkä se tulee joskus käyttöön. Nyt minulla on kaksi irtokarkkirasiaa täynnä filmipurkkeja - toisessa on värejä joita käytän säännöllisesti, toisessa kaikenlaisia kuriositeetteja joita ilman pärjäisin mainiosti. Yksi asia on varma: väripurkkien määrä kasvaa kasvamistaan.
Ensimmäisenä kuukauden värinä saa olla okra, ikonimaalarin jokapäiväinen ystävä ja uskollinen työjuhta. Tuskinpa on olemassa ikonia, jota olisi malattu ilman okraa. Se on mustan ja maapunaisen ohella ihmiskunnan kaikkein vanhimpia pigmenttejä, joita on käytetty jo paleoliittisen ajan hautausrituaaleissa ja luolamaalauksissa.

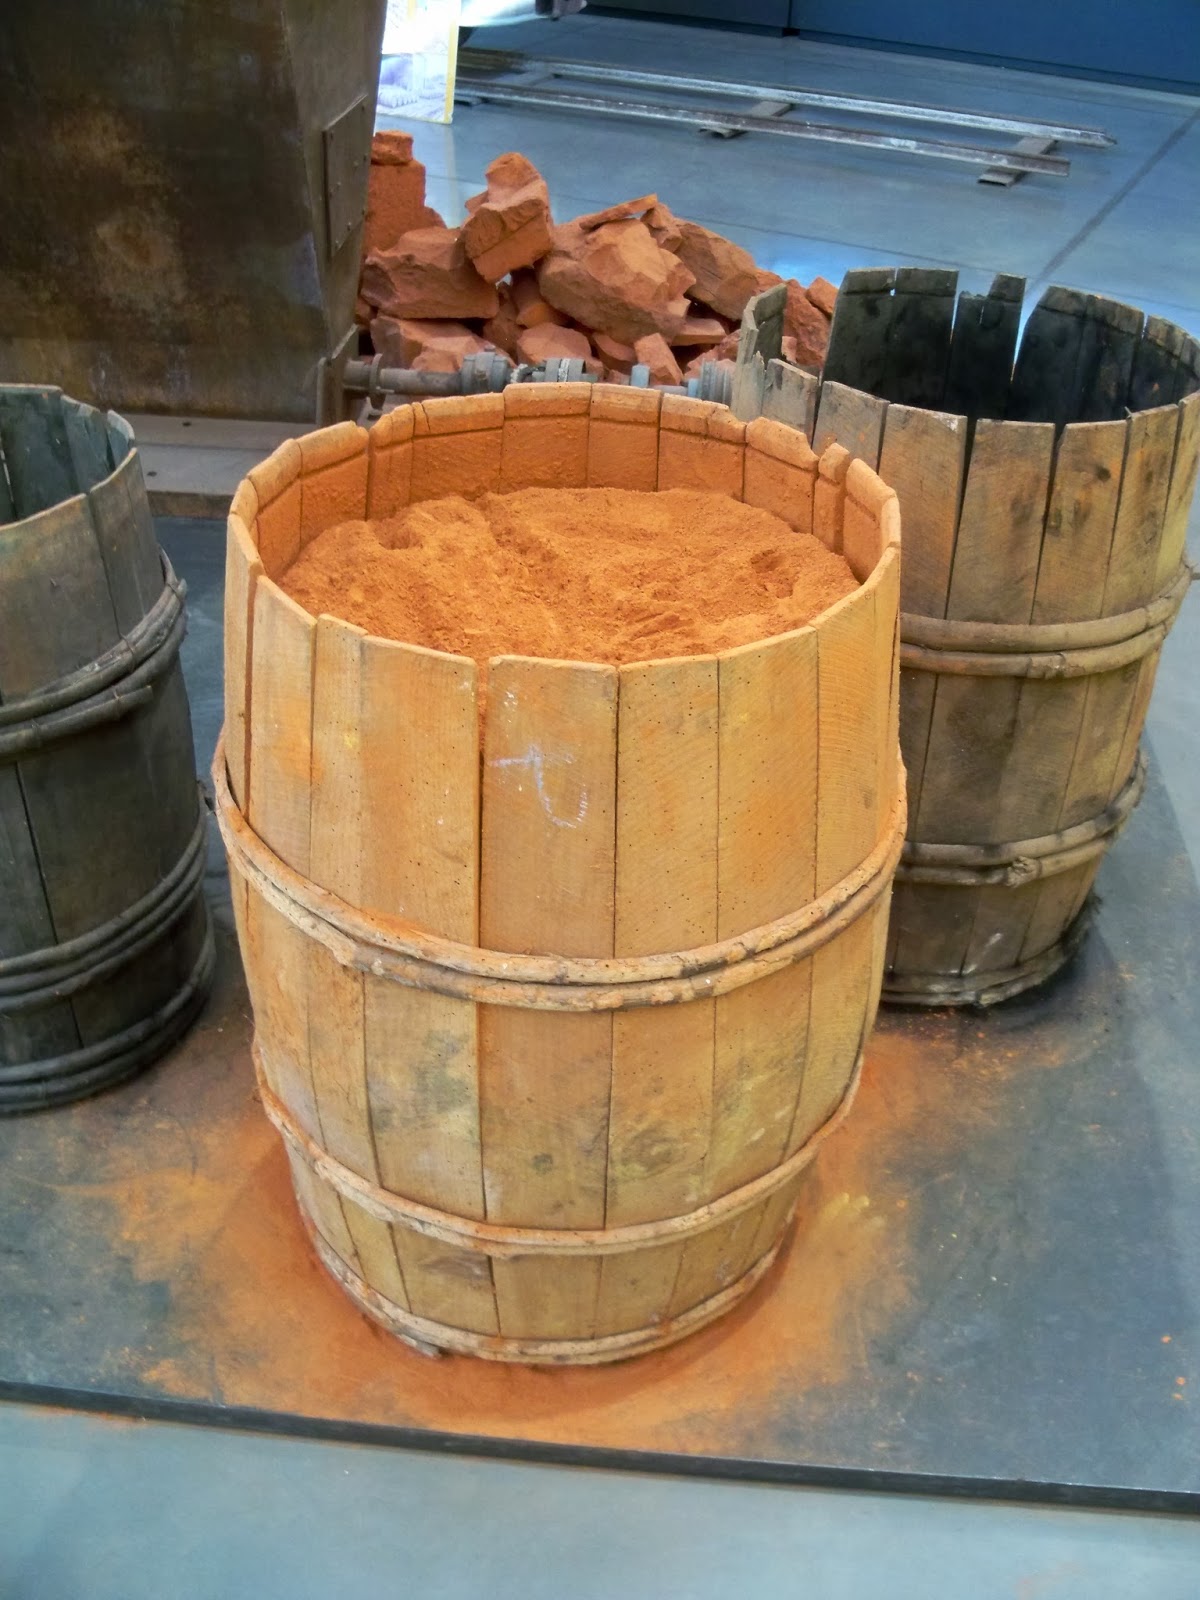
Tynnyrillinen punaokraa - A keg of red ochre
Okra on itse asisassa iso joukko värejä: keltaokra, kultaokra, punaokra... kemiallisesti jopa punaruskea sienna ja harmaanvihreä raaka umbra kuuluvat samaan, rautapitoisten savien väriperheeseen. Okra voi olla vaalean keltaista, vihertävää, oranssia tai jopa purppuraista. Olen leikitellyt ajatuksella kerätä "koko sarjan" ja käyttää niitä yhdessä työssä. Eri puolilta maailmaa löytyy eri värisiä okria, siksi joitakin okria kutsutaan löytöpaikan mukaan, kuten esimerkiksi ochre de Berri.
Okraa - tai mitä tahansa maapigmenttiä - voi valmistaa itse, jos löytää sopivan väristä maata. Suurimmat kivet poistetaan ja väri puhdistetaan liettämällä. Savimaa murskataan hienoksi, sekoitetaan runsaaseen vesimäärään ja kaadetaan astiasta toiseen, ja annetaan epäpuhtauksien laskeutua pohjalle. Kuumentamalla okraa voi varmistaa onko siinä orgaanisia aineita mukana: jos se muuttuu punertavaksi, se on puhdasta, jos taas mustaksi seassa on multaa tai kasvinjätteitä. Värinvalmistajana olen vielä täysin teoreetikko, viime keväänä löysin Porvoosta keltamultaa, siis jonkinlaista okraa, keskeltä polkua ja otin sitä desilitran mukaani. Lupaan raportoida tuloksista, kun ehdin käsitellä sen.
Vaikka ostaisi okransa kaupan hyllyltä, sitä täytyy yleensä hiertää veden kanssa. Värin hiertäminen saattaa joskus tuntua ärsyttävältä, mutta jos sitä ei tee, ikonin pintaan kerääntyy muruja, jotka puolestaan keräävät emulsiota, ja kasvavat vielä isommiksi. Okran on hyvä antaa ensin imeä vettä itseenä hetken, ennen hiertämisen aloittamista. Hiertämisessä on omat niksinsä, kun aikansa on hierrellyt, oppii paremmin hallitsemaan lasilevyllä vellovaa värimassaa, vuoroin kokoamaan ja levittämään sitä. Kuuntelemalla hiertimen ääntä tietää, milloin väri on valmis. Rahina muuttuu suhinaksi. Ei ihme, että keskiajan maalareiden oppipojat saivat aloittaa harjoittelunsa hiertämällä mestarille värejä, siinähän oppii kärsivällisyyttä. Maimerin keltaokra, ochre giallo, on niin hienoa, ettei sitä tarvitse erikseen hiertää.
Ikonimaalauksessa okraa tarvitaan heti työskentelyn alussa, sen jälkeen kun esipiirros on siirretty ja kiinnitetty laudalle. Pohjusteen kova valkoisuus rauhoitetaan sivelemällä ristiin rastiin, isolla siveltimella pari laihaa kerrosta "pohjaokraa". Seuraavaksi okraa saatetaan tarvita sankirin, ihon pohjaväriin, ja välilasuuriin ja toiseen vaalennosväriin, sitten kenties vaatteeseen tai kallioihin tai taustaan. Ei ikonia ilman okraa, väitän.

Le Sentier des ocres, (Okrien polku) Roussillon, Ranska
The path of Ochers, Roussillon, France
The path of Ochers, Roussillon, France
I am starting a series of posts about pigments. Most iconographers have an impressive collection of them: natural, syntethic, harmless, poisonous, indispensable and superfluos. You start with just a few jars - and you could get along just perfectly with them. Pliny the Elder claimed that the painters of ancient Greece only used withe, yellow, red, green and black. This assertion is partly based on a misunderstanding of terminology - the Romans used the same word for blue and green. Nevertheless, six of seven pigments, well chosen, could make an icon.
Just five pigments: withe, ocher, red, green and black.
Romanescque wallpainting, Birnay, France

Vain viisi pigmenttiä: valkoinen, okra, maapunainen, vihreä ja musta.
Romaaninen seinämaalaus, Birnay, Ranska.
Of course, you will get curious when you see all the beautyfull colors the other painters have. Sometimes you make an impulse purchase, or change small amounts with your firends. Some colors you need for every icon, or in large amounts, some colors you need for one little detail. Once I bought a jar of Sennelier Veronese green for an icon. It turned out to be a totally wrong kind of Veronese green, garish and bright, totally useless for the thing I intended it for. I feel vexed very time I see the jar in the back of the cupboard! Last summer someone gave me a small amount of cobalt violet, I have no idea what to use it for, but it looks nice. Nowadays I have two plastic candy boxes full of little jars with pigments -the jars are plastic containers for 35 mm film. In one of the boxes I have the colors I need all the time, the others I very well could do without. One thing is certain, the jars seem to multiply...My first "pigment of the month" is ocher, the iconographers loyal friend and everyday companion. I don´t think there is a icon, wich is painted without ocher. Together with black and earth red, ocher is our oldest pigment, wich was in use already in paleolitic times for cave paintings and burial rituals.
Ocher is as a matter of fact a wide range of colors: yellow ocher, golden ocher, red ocher... chemically the brownish sienna and greenish raw umber too belong to the same family of iron bearing clays. Ocher can be pale yellow, greenish or even purplish. I have been playing with the tought of "collecting them all" and using them all in one work. Clay from different parts of the world have different shades - hence ochers with a name of a place, ochre de Berri, for example.

Even if you buy your ocher from your artist supply shop, you usually have to grind it. Grinding pigment can be tedious, but if you don´t do it, you will have little crumbs of clay all over your icon. All those crumbs will collect emulsion, and get bigger and bigger. It is good to let the ocher soak up some water for a while before grinding. When you have ground your pigments for a couple of icons, you will have found the right way to use the muller to collect the color and spread it out. By listening to the sound of the grinding, you learn when your color is ready, it´s when the rasping turns to swishing! No wonder the medieval masters made their apprentices grind the pigments - it does teach you patience. The yellow ocher of Maimeri is exceptionally fine, and does not require grinding.
The iconographer needs ocher right when the he starts painting, when the drawing is moved to the board. The first thing to do is tone down the glaring withe of the gesso with a little ocher, lots of water, a little emulsion and a big squirrel brush. Next he needs ocher for mixing the sankir, the ground color for skin tones. To achieve smooth changes from light to shade, one needs ocher glazes between the the layers of lighter colors. You might also need your ocher for clothes, or rocks or the background. No ocher, no icon, I would say!


